Post processing a scanned negative
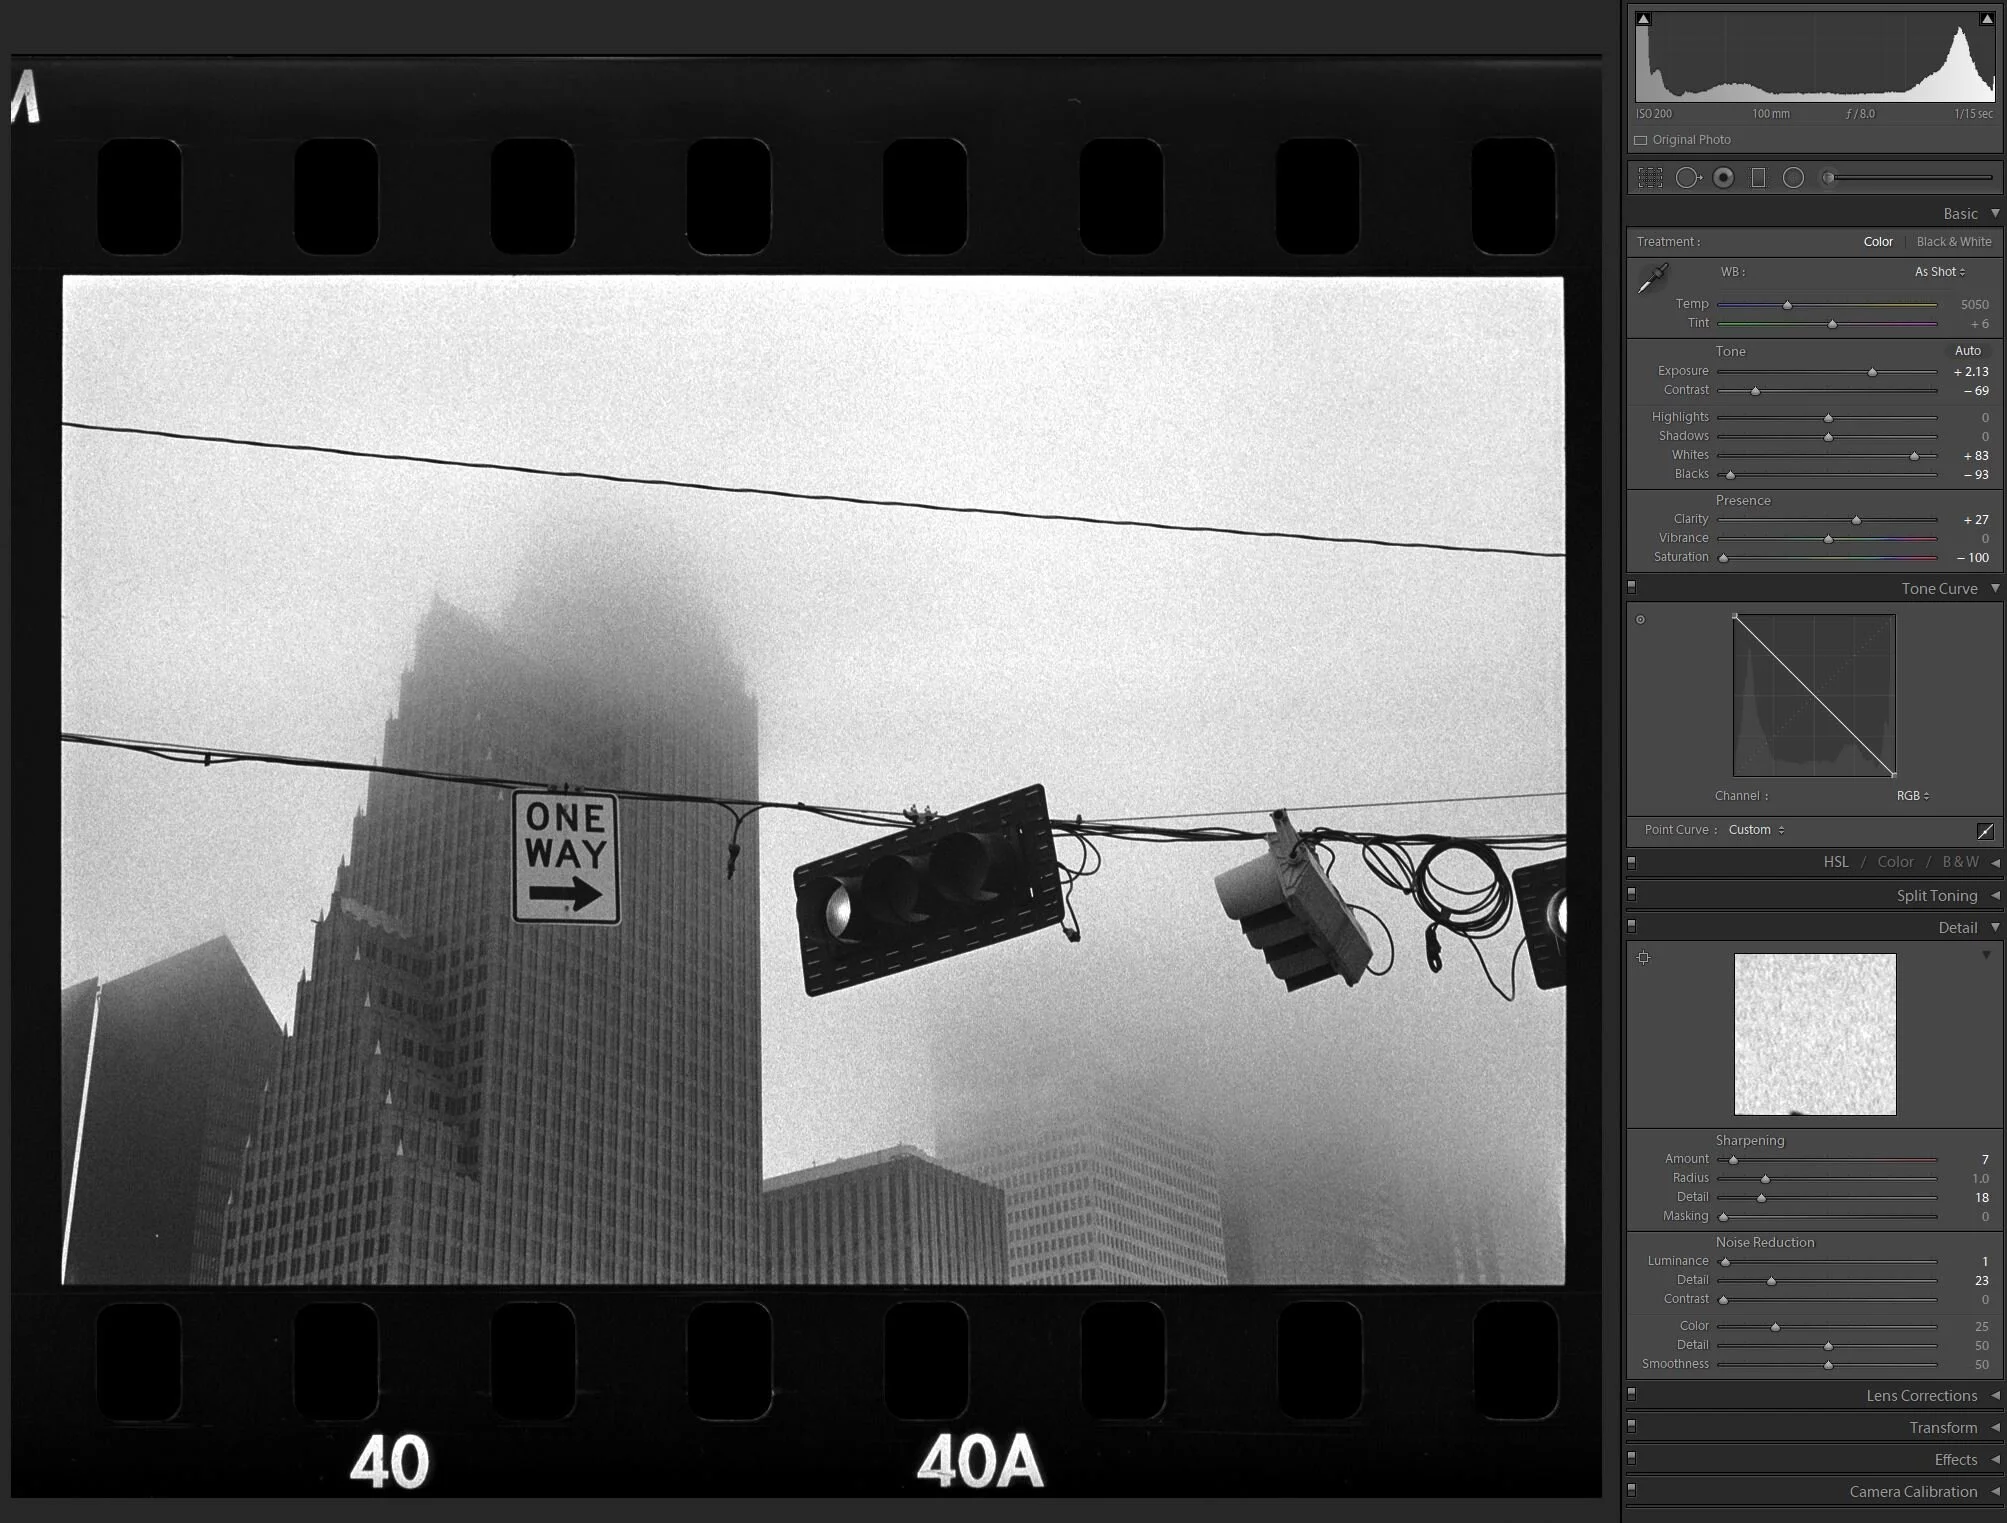
Houston Police Memoral. Hasselblad 500cm, Ilford HP5.
Playing with film is easy - take pictures, develop the film, make scans and process them digitally. This hybrid method means you don't need a darkroom or an enlarger until you want to go all-in. I have a simple overview of the entire workflow available here.
In this post, I'll elaborate on how I treat black and white images after they are scanned.
Post-scanning workflow
Once a set of black and white negatives is developed and scanned, the digital files can be processed like any other digital image. My scanning is done with a tethered DSLR on a tripod over a light table. Here are the processing steps I usually take:
Importing
I import the images from the tethered image folder (move rather than copy) with a preset that inverts them into positives and decreases saturation to zero. The preset also adds metadata tags including film type and camera type.
For the inversion I use curves - it is the only way to do it as there is no 'invert image' function like with Photoshop. Move the left-hand node from the bottom to the top, and the right-hand node from the top to the bottom (see the screengrabs below).
Processing
Update May 2022: I have a youtube video covering a lot of this information in detail
Because each frame is scanned in the exact same location on the light-table, I can use a 'sync' in the Develop module to crop all the images at once. I usually leave the film border on the image and crop it out of those I intend to print.
Why leave on the film borders? Because they have frame numbers in case they are needed in the future to match with the physical negatives. They are a visual aid to determining which images are truly film vs digital black and white when scanning through Lightroom. They often look great when left as original borders on an image.
If no import preset was used, invert the image with the curves, and decrease saturation to zero.
For each image, I shift the exposure to centralize the tones on the histogram.
Black and white points are adjusted, usually to the extremes. The frame border should really be pure black and the text (like Ilford HP5, or Kodak TriX, or a frame number) should be pure white. This is a good starting point, but adjust for the photograph.
If the black point still doesn't clip (remember this is altered by the 'whites' slider after the inversion), I'll use the curves to clip them slightly. This generally takes the image from foggy to clear.
Luminance can help with a grainy picture, depending on what is desired.
Some post-crop vignette can help divert attention from the edges of an image.
Exporting
I export using a custom export preset: The files are resized to 1250 pixels on the long edge at 150 dpi and 77% quality for a Jpeg.
Presets
Presets are essentially a one-click macro that automatically applies a series of tweaks all at once. Other than the ones I use on import/export, general developing presets can be tricky to use if they were developed for regular digital images. I’ve found that if any presets used the tone curve, they reset the image back into a negative. Another side effect is that any colour corrections are inverted, too. So any sun or warming brushes turn into cold blue tones on my inverted negatives.
It seems there is a gap in the market for those using Lightroom presets for images originating on negative film. If there is the demand, I can make my simple import and export presets available.
Lightroom pitfalls
Lightroom has no 'invert image' function. The inversion must be achieved with curves.
A number of sliders are reversed once the negative is made positive with curves. Exposure is back to front, as are the blacks and whites sliders.
I still haven't figured out how to deal with the highlight and shadow sliders on an inverted image. They can be unpredictable, especially the highlights.
The adjustment brush auto-mask function doesn't seem to work well with my images - maybe because of the grain, or because they have been inverted. Auto-mask usually works fine on my conventional digital images.
Because I leave the film borders on each image, it can confuse the auto-transform function when trying to correct for perspective. I have to rely on manual corections.
The negative origin of the image seems to confuse the spot heal tool, too. It seems to pick sample areas that are not at all similar to the heal area.
Lightroom won't do face recognition on an image inverted from a negative.


